RPM parts you’ll need:
Slash 2wd Front Skid Plate
Slash 2wd Rear Skid Plate
Before you begin, we recommend replacing the Phillips screws supplied with some versions of the Traxxas Stampede with the screw kit from a VXL version Stampede. They are better quality hex screws. You will need both 2mm and 2.5mm hex drivers if you pursue this option.

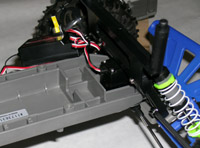
The rear skid plate bolts right on to the Stampede with no modifications, other than you cannot use the new third mounting post in the center of the RPM skid plate. The post lines up directly under a cross rib in the chassis that would interfere with the mounting screw. The RPM skid plate, even with the unattached post, is still far superior to the stock unit! If you intend to run a wheelie bar, you will need to install an RPM Bumper / Wheelie Bar Mount. The Traxxas wheelie bar mount will not work with the RPM rear skid plate.
Attaching the front RPM skid plate requires a little extra work, but goes rather easy.
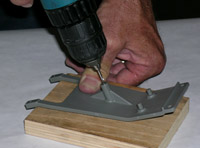
To start, simply remove the stock Traxxas skid plate from the truck. Begin the modification by drilling out the third mount post hole in the RPM skid plate all the way through using a #38 drill (.101″ Dia.).
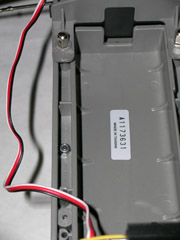
Next, looking from the top of the chassis down, on the passenger (right) side of the vehicle, there is a small hole 1/2″ in front of the antenna hole. Using the same #38 drill, drill through that chassis hole all the way through the bottom of the chassis.
Now you can install the skid plate using the two larger flathead screws into the front bulkhead.
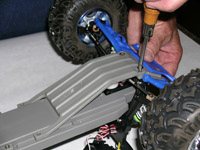
Using one of the screws that held the rear of the stock skid in place, thread it into the new hole you just drilled near the antenna.
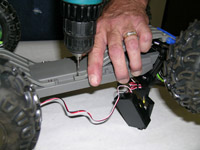
For the next step you will need to remove the two battery strap hex posts to move the receiver out of the way.
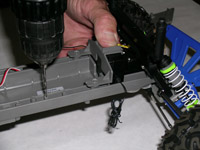
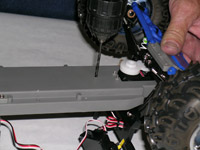
Now, using the same #38 drill as before, use the hole in the skid plate from step #1 as a guide to drill down and through the chassis.
You’ll notice that there is still one leg of the skid plate without a mounting hole. Using the #38 drill, hold the other leg of the skid plate in place and use the skid plate hole as a guide to drill through that hole and all the way through the chassis as well.
Remove the skid plate and using a 1/8″ diameter drill, redrill both the center post and driver’s side leg hole to bring the size to the correct 1/8″ dimension. Caution: Do not drill out the passenger’s side hole to 1/8″!

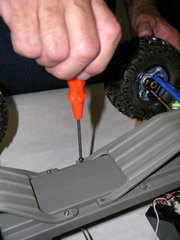
Now you can reinstall the RPM front skid plate and use the included M3 X 12mm screws (1 ea.) provided with the RPM skid plates in both the center skid post then in from the bottom on the driver’s side (left) rear leg (you will need to have purchased both a front and a rear skid plate to have both screws required).
Since the chassis is fairly thin on the driver’s side rear leg mount, install a 3mm nut (preferably a locknut) down inside the rib area on to the M3 X 12mm screw. Install the receiver back into place and you’re done!