The look of a scale ball hitch can be achieved using a hand-drill or drill press and a standard ball-stud. Associated Ball Studs work well, but a true scale appearance will be most closely achieved with an oversized ball stud from any manufacturer such as Associated or Lunsford, to name a couple. You will also need a nut to hold the ball stud in place once mounted to the bumper (T/E-Maxx bumpers only).
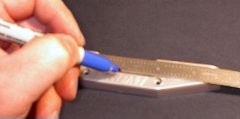
Start by marking a spot on the bumper for the ball stud (although the photos on this page show the use of a marker, RPM recommends using a pencil or other easily removable marking device because a marker will leave permanent marks!). Using a scale or ruler, measure 1/2 the distance between the bumper mounting holes (about 1.025″ or 1-1/32″ for the T/E-Maxx Bumper and 0.818″ or 13/16″ for the Revo Bumper) and mark the bumper.
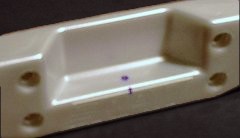
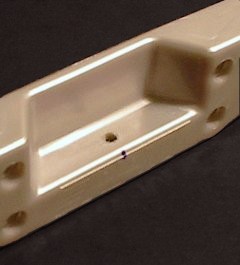
Next, at that spot, measure from the back (the license plate area of the bumper), 0.200″ or 13/64″ for both the T/E-Maxx Bumper & the Revo Bumper (1/2 the distance to the front) and place a bright dot on the bumper. This will be the spot to drill.
Be sure not to get too close to the front edge of the bumper or a nut will not fit over the thread (T/E-Maxx Bumper only). Revo owners, do not use a nut. It will hit on the lower tubular bar.
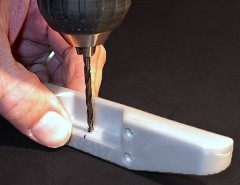
T/E-Maxx owners – If you are using a standard 4-40 ball stud, use a #39 drill and drill through only one wall of the bumper (if you are using a 5-40 ball stud, use a 1/8″ drill). See the drill sizes listed for the Revo below if you do not wish to use a nut.
Revo owners – Use a #43 drill for 4-40 ball studs and a #38 drill for a 5-40 ball stud. It may also be easier to drill through from the bottom of the bumper, this way, you won’t risk hitting the lower tubular bar and risk voiding the RPM warranty on the bumper. Carefully drill through the flat area of the bumper. It might be a wise idea to use a tap and thread the hole before trying to install the ball stud since the hole is close to the edge of the flat area of the bumper. Once the hole is threaded with the tap, simply thread the ball stud in place.
T/E-Maxx owners – Do not drill all the way through both walls. Once the hole has been drilled, thread the ball stud into the bumper until it just starts to show through the bottom. Now place the nut under the thread and finish threading the ball stud through the bumper. If the hole was drilled to the proper size, a nut may not be necessary although it will keep the ball stud from vibrating loose.
Please note: This hitch idea is for appearance only! It is not a working ball hitch and will void RPM‘s breakage guarantee on the bumper if it is used for towing.
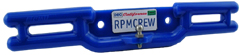
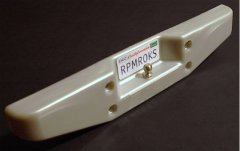
Before you ask: The license plates in the finished photos of the bumpers were made using Adobe Illustrator and printed using a color printer on adhesive label paper. The best size for the license plates is 1.100″ x .500″ with .060″ radii corners. Feel free to copy the idea but please do not ask us to make the license plates for you. This is just an example of what you can do to personalize your truck with RPM parts.